+ Gold glitter capped toe pumps +
Things you need:
- Glue, preferably fabric glue. (I used PVA glue as I couldn't get my hands on a fabric glue ): )
- Fine glitters in the color you want to apply on your fabric/shoe/accessories.
- A small cup or container to mix your glue and glitter together.
- Toothpicks to remove glitter from your under-shoe.
- Paintbrush in various sizes, in case of difficult areas to glitter.
- Something to roughen the area to glitter. It can be a foot file or table knife(be careful!) or sand paper.
- Last but not least, your shoe! :)
Time to start!!!
From L to R: Foot file to roughen the shoe, toothpicks, small pudding cup, fine glitters(multi-color, silver & gold), white PVA glue, flat-head brushes.
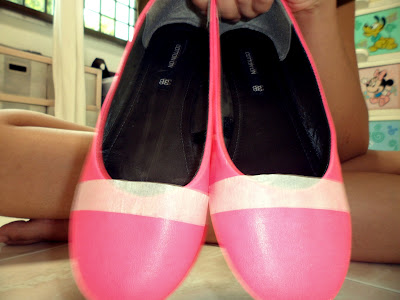
Get ready your shoes.
And tape till the area where you want to glitter.
For my case, I want to glitter it till 1 inch below the leg opening. :)
Remember to lay some newspaper on the floor.
You won't want a floor full of glitter, though it may seem pretty but that's not the way. :)
It's very difficult to sweep it up eventually, so lay protection!
Glitters in multi-color, silver and gold. The gold looks like copper, haha.
Another close up shot of how the glitter looks like.
I love the multi-colored one, but that's the last bottle left :(
Step 1:
use the foot file, or whatever you've chose to use, and rub all over the area.
Use a little force, don't be afraid as that area will be covered in glitter.
No one can see those ugly marks :)
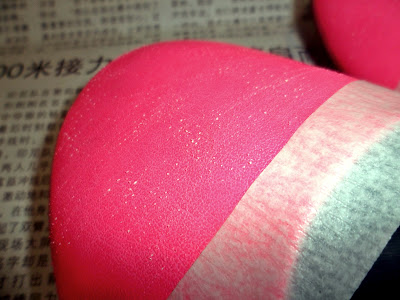
After step 1:
To make sure if it's roughen out, feel the area and compare the texture with the other parts.
Step 2:
Prepare your glue and pick your paintbrush(I used #12).
Then pour the glue into the small cup. Estimate how much you need.
In my case, I poured a 50 cents coin size.
If you need more you can add on later.
No worries :)
Step 3:
Prepare your desired glitter.
Pour appropriate amount into the glue, and mix it.
After step 3:
This is what you'll get after mixing the glue and glitter together.
I recommend you to add in more glitter so the white glue won't be so obvious in the mixture.
It will help when you apply onto the shoe.
Step 4:
Apply the glue onto the area.
Now you can see why I recommend you to mix more glitter into the glue.
This glue will set clear when dried. :)
Step 5:
Slowly add on your glitter, layer by layer.
Give grace time in between, about 3-5 mins.
Step 6:
Do the same steps 4 & 5 to the other shoe.
While waiting for the glue layer to set, you can play some games, read some books or watch shows!
I played Tiny Tower on my iTouch tho. :)
Step 7:
Check that the glitter is layered evenly.. no spots in between!
Do check under places which has good lighting. :)
This is how mine looks like after 3 layers of glitter.
Still some white spots which needs touching up!
Finally all done after the 4th layer of glittering! :)
I'm very satisfied with it!
*my shoes cost me less than S$10 from Cotton On!*
Step 8:
Pose proudly with your DIY-ed glitter capped toe shoes!
Haha! :)
Step 9:
Leave your shoes to dry, preferably at a place with wind.
Make sure you put in a position such that the shoes won't drop down! :)
Now wait for the shoes to dry completely then spray it with some adhesive or a cheaper option, hairspray!
And you're good to go off for a walk with your 'brand new' shoes! :)
Pros & Cons of this DIY:
Pros
- Your boring, one-colored shoe will look just like new!
- Color-blocking is the trend this season!
- It's one-of-a-kind and eye-catching!!! :)
Cons
- The glitter may fall off when you come in contact with other stuffs.
Good Luck! :)
xoxo, D.


No comments:
Post a Comment